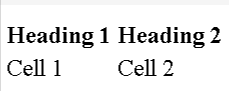
<th> tag full form and usage
The <th> tag in HTML defines a table header cell, used to label columns or rows in a table. Text inside <th> is bold and centre-aligned by default, improving clarity and accessibility of tabular data.
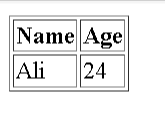
<table border="1">
  <tr>
    <th>Name</th>
    <th>Age</th>
  </tr>
  <tr>
    <td>Ali</td>
    <td>24</td>
  </tr>
</table>
Output
tr tag full form and usage
"Table row" is what <tr> stands for, and it creates horizontal rows of cells in HTML tables—this element groups table cells horizontally. Content inside a <tr> element appears on the same row.
Each table row requires a <tr> tag, and rows stack from top to bottom in the order they appear in the source code. A row box takes one row of cells to build your table's horizontal structure.
Browsers automatically add the <tbody> to the markup when <tr> is a direct child of its parent <table> element. This occurs only when there are no explicit <tbody> elements and after any <caption>, <colgroup>, or <thead> elements.
Simple table in HTML with example
Here's a simple HTML table with two rows and two columns:
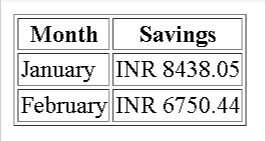
<table border="1">
  <tr>
    <th>Month</th>
    <th>Savings</th>
  </tr>
  <tr>
    <td>January</td>
    <td>INR 8438.05</td>
  </tr>
  <tr>
    <td>February</td>
    <td>INR 6750.44</td>
  </tr>
</table>
Output
This example shows a basic table that has:
- A border attribute of "1" that makes the structure visible
- One header row with two column titles ("Month" and "Savings")
- Two data rows showing months and their savings amounts
Your browser displays this as a structured table with clear rows and columns that make data easy to read.
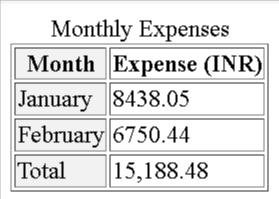
<tfoot> tage full form and usage
The <tfoot> tag is used to group footer content in an HTML table. It's placed before <tbody> in the source code, even though it renders after the body content. This helps browsers render large tables faster by knowing the footer in advance.
<table border="1">
  <caption>Monthly Expenses</caption>
  <colgroup>
    <col span="1" style="background-color: #f2f2f2;">
    <col span="1">
  </colgroup>
  <thead>
    <tr>
      <th>Month</th>
      <th>Expense (INR)</th>
    </tr>
  </thead>
  <tfoot>
    <tr>
      <td>Total</td>
      <td>15,188.48</td>
    </tr>
  </tfoot>
  <tbody>
    <tr>
      <td>January</td>
      <td>8438.05</td>
    </tr>
    <tr>
      <td>February</td>
      <td>6750.44</td>
    </tr>
  </tbody>
</table>
Output
How to Create a Table in HTML with Example
HTML tables need both structural knowledge and implementation skills. Let's dive into building HTML tables from scratch now that we understand the simple syntax.
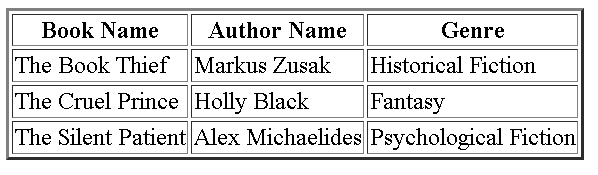
Step-by-step example of table tag in HTML
You'll need these steps to build a working HTML table:
1. The <table> tag is used to define your table
2. Add a border attribute that allows you to see the table (for instance, border="1")
3. Use <tr> tags to make the very first horizontal row
4. Insert <th> tags representing header cells which contain column titles
5. Use <tr> tags to create additional rows
6. Write your information in data cells with the help of <td> tags
Here's what it looks like in practice:
<table border="2">
  <tr>
    <th>Book Name</th>
    <th>Author Name</th>
    <th>Genre</th>
  </tr>
  <tr>
    <td>The Book Thief</td>
    <td>Markus Zusak</td>
    <td>Historical Fiction</td>
  </tr>
  <tr>
    <td>The Cruel Prince</td>
    <td>Holly Black</td>
    <td>Fantasy</td>
  </tr>
  <tr>
    <td>The Silent Patient</td>
    <td>Alex Michaelides</td>
    <td>Psychological Fiction</td>
  </tr>
</table>
Output
HTML offers semantic tags that help organize larger tables into clear sections:
- <thead>: Holds your table's header rows
- <tbody>: Contains the main table content
- <tfoot>: Keeps the footer rows
- <caption>: Adds a title to the table..
- <colgroup>: Defines and styles table column groups.
Browsers can display tables faster with these elements, especially when handling big datasets. They also make tables more available to screen readers and print better across multiple pages.
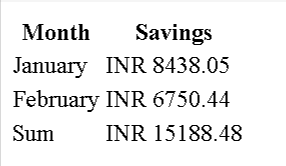
<table>
  <thead>
    <tr>
      <th>Month</th>
      <th>Savings</th>
    </tr>
  </thead>
  <tbody>
    <tr>
      <td>January</td>
      <td>INR 8438.05</td>
    </tr>
    <tr>
      <td>February</td>
      <td>INR 6750.44</td>
    </tr>
  </tbody>
  <tfoot>
    <tr>
      <td>Sum</td>
      <td>INR 15188.48</td>
    </tr>
  </tfoot>
</table>
Output
The <thead> should appear after any <caption> and <colgroup> elements but before <tbody>, <tfoot>, and <tr> elements. The <tfoot> element needs to come after <caption>, <colgroup>, <thead>, <tbody>, and <tr> elements.
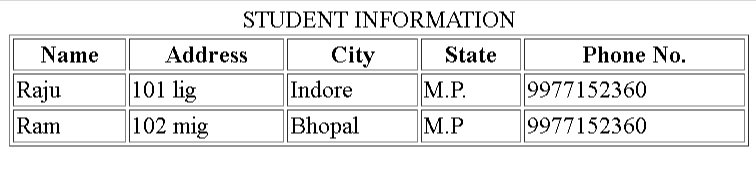
table tag in HTML with example for student data
Student records work perfectly with HTML tables. Here's an example that shows student information with proper structure:
<table style="width:100%" border="1">
  <caption>STUDENT INFORMATION</caption>
  <thead>
    <tr>
      <th>Name</th>
      <th>Address</th>
      <th>City</th>
      <th>State</th>
      <th>Phone No.</th>
    </tr>
  </thead>
  <tbody>
    <tr>
      <td>Raju</td>
      <td>101 lig</td>
      <td>Indore</td>
      <td>M.P.</td>
      <td>9977152360</td>
    </tr>
    <tr>
      <td>Ram</td>
      <td>102 mig</td>
      <td>Bhopal</td>
      <td>M.P</td>
      <td>9977152360</td>
    </tr>
  </tbody>
</table>
Output
The <caption> tag adds a descriptive title that makes the table more meaningful and user-friendly.
Tables in HTML become powerful through their attributes that allow precise control over appearance and behavior. Each attribute provides specific customization options to enhance visual presentation and functionality.
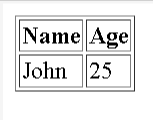
border, cellpadding, cellspacing attributes
HTML tables have three main spacing-related attributes that basically change how they are visually displayed:
The border is the attribute that defines the thickness of the table's outline. When set to "0", the border goes inactive. Although HTML5 has already deprecated it, some developers are still using it for styling purposes:
<table border="1">
  <tr>
    <th>Name</th>
    <th>Age</th>
  </tr>
  <tr>
    <td>John</td>
    <td>25</td>
  </tr>
</table>
Output
The cellpadding attribute defines the space between a cell's content and its border. This creates breathing room inside each cell and makes content more readable:
<table cellpadding="15">
  <!-- Table content here -->
</table>
The cellspacing specifies the space between two cells i.e. the width of the space. The default value for cellspacing in browsers is usually 2 pixels. However, the use of CSS properties is more preferable because HTML5 has deprecated both the cellpadding and cellspacing attributes.
<table cellspacing="10">
  <!-- Table content here -->
</table>
table border tag in HTML explained
The border attribute adds visible boundaries to tables quickly. It creates a frame around the entire table and individual cells. The value represents border thickness in pixels:
<table border="2">
  <!-- Table content with 2px borders -->
</table>
The border attribute has limitations. CSS offers better alternatives:
- border-collapse: Controls whether cells share borders or have separate ones
- border-style: Determines appearance (solid, dotted, dashed, etc.)
- border-width: Sets thickness precisely
- border-radius: Creates rounded corners for modern designs
Here's how to create collapsed borders:
<table border="2">
  <!-- Table content with 2px borders -->
</table>
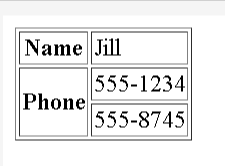
Using Rowspan and Colspan in HTML Tables
One of the ways to make HTML tables more flexible is by merging cells, which allows the tables to have different designs that basic tables can not give. By manipulating the rowspan and colspan attributes, developers can visually map out the tables that are spread over more than one row or column and hence create complex data presentations.
HTML table rowspan and colspan with example
Rowspan and colspan attributes reshape the rigid structure of HTML tables. The colspan attribute lets cells extend horizontally across multiple columns, while rowspan makes cells expand vertically across multiple rows.
Here's a practical example that shows both attributes:
<table border="1">
  <tr>
    <th>Name</th>
    <td>Jill</td>
  </tr>
  <tr>
    <th rowspan="2">Phone</th>
    <td>555-1234</td>
  </tr>
  <tr>
    <td>555-8745</td>
  </tr>
</table>
Output
How to merge cells using colspan
The colspan attribute in a <td> or <th> tag merges cells horizontally. Its value shows how many columns the cell should occupy. The syntax remains simple:
<td colspan="number">Content here</td>
This creates a single large horizontal cell from multiple cells in the same row. Look at this example:
<tr>
  <td colspan="2">Sum: INR 15188.48</td>
</tr>
This code spans two columns, which works well for totals or section headings.
How to span rows using rowspan
Cells can extend vertically across multiple rows with the rowspan attribute. The value indicates the number of rows a cell should cover:
<td rowspan="number">Content here</td>
A real-world example shows this:
<tr>
  <td>January</td>
  <td>INR 8438.05</td>
  <td rowspan="2">INR 4219.02</td>
</tr>
<tr>
  <td>February</td>
  <td>INR 6750.44</td>
</tr>
Output
The third cell spans two rows, which displays shared data effectively.
Styling HTML Tables with CSS
CSS styling plays a crucial role in enhancing HTML tables' visual appeal. Tables with proper styling can significantly improve data readability and enhance the user experience.
Adding borders and padding
CSS provides better control over table borders than HTML attributes. You can create distinct borders by targeting table and cell elements:
table, th, td {
  border: 1px solid black;
  border-collapse: collapse;
}
The border-collapse property removes double borders between cells. You can create invisible borders with colored backgrounds:
table, th, td {
  border: 1px solid white;
  border-collapse: collapse;
}
th, td {
  background-color: #96D4D4;
}
Content becomes more readable with padding that creates space inside cells:
th, td {
  padding: 15px;
}
You can target specific sides for different padding values:
th, td {
  padding-top: 10px;
  padding-bottom: 20px;
  padding-left: 30px;
  padding-right: 40px;
}
Zebra striping rows
Data-heavy tables become easier to read with alternating row colors. The :nth-child() pseudo-class makes this simple:
tr:nth-child(even) {
  background-color: #D6EEEE;
}
Using (odd) colors rows 1,3,5, and so on. You can create vertical zebra stripes by targeting columns:
td:nth-child(even), th:nth-child(even) {
  background-color: #D6EEEE;
}
A checkerboard effect emerges by combining both approaches:
tr:nth-child(even) {
  background-color: rgba(150, 212, 212, 0.4);
}
th:nth-child(even), td:nth-child(even) {
  background-color: rgba(150, 212, 212, 0.4);
}
Responsive table design using CSS
Small screens often cause tables to break layouts. You can create responsive tables by wrapping them in containers with horizontal scrolling:
<div style="overflow-x:auto;">
  <table>
    <!-- Table content -->
  </table>
</div>
A scrollable table appears when space becomes limited by setting the container's width and overflow-x property:
.table-wrapper {
  width: 100%;
  overflow-x: auto;
}
Wide content can be managed with word-break:
td:last-child {
  word-break: break-all;
}
Tables still prove valuable for specific layout scenarios in HTML, especially when you have forms and complex data presentations to structure. Modern CSS alternatives exist, but tables offer unique advantages in certain use cases.
Using table tag in form HTML layout
HTML tables afford a more systematic layout for form elements. Creating a form with HTML tables is a multi-step process:
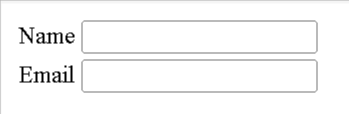
First, put your cursor in the form area. Use the <table> element to make an HTML table and then insert the <form> element inside it. Everyform field will correspond to a table row with the <tr> element. In the case of labels andinput fields, they become two separate columns using <td> elements.
However, this method has some disadvantages - forms cannot be nested inside <table>, <tbody>, or <tr> elements as per browser specifications. The form is relocated by the browser to a position after the table. A more elegant fix wraps in the form element the whole table:
<table>
<form>
  <tr>
    <td><label for="name">Name</label></td>
    <td><input type="text" id="name" /></td>
  </tr>
  <tr>
    <td><label for="email">Email</label></td>
    <td><input type="email" id="email" /></td>
  </tr>
</form>
</table>
Output
This approach comes with limitations - browsers don't allow a form to be a child element of <table>, <tbody> or <tr>. The browser moves the form to appear after the table. A better solution wraps the entire table inside the form element:
<form>
  <table>
    <!-- Table content -->
  </table>
</form>
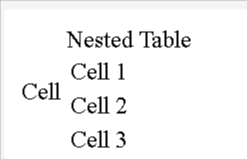
Nested tables and layout examples
Nested tables simply place one table inside another table's cell. Creating nested tables requires a few steps:
Start with an outer table. Add another complete table structure within a specific <td> cell. The nested table must begin and end within the same cell.
Here's an example of a nested table:
<table>
  <tr>
    <td>Cell</td>
    <td>Nested Table
      <table>
        <tr><td>Cell 1</td></tr>
        <tr><td>Cell 2</td></tr>
        <tr><td>Cell 3</td></tr>
      </table>
    </td>
  </tr>
</table>
Output
Conclusion
HTML tables are the foundations of structured data presentation on websites. This piece explores everything in HTML tables. The simple syntax elements like <table>, <tr>, <td>, and <th> work together. These elements create well-laid-out rows and columns that turn raw data into readable, available information.
Tag names make more sense when you know what they mean. <td> stands for "table data" and <tr> means "table row." These structural elements help developers build tables. Our examples show how simple tables grow into complex data presentations with proper implementation.
Table attributes substantially improve presentation options. Borders, cellpadding, and cellspacing control spacing and boundaries. Width and height determine table dimensions. HTML5 has deprecated many of these attributes, yet they still matter for quick formatting and backward compatibility.
Cell merging stands out as one of HTML tables' powerful features. Rowspan and colspan attributes create sophisticated layouts by letting cells span multiple rows or columns. This works especially when you have comparison charts, pricing tables, or data that needs a hierarchical structure.
CSS styling turns simple tables into attractive components. Border styling, zebra striping, and responsive design make tables work across devices. Of course, modern web development prefers CSS for styling over HTML attributes.
Tables do more than just present data. They help with form layouts and complex nested structures. Developers should think about accessibility and responsive behavior when using these patterns.
HTML tables have stood time's test because they do one thing exceptionally well—organizing data in a grid format. Modern web development doesn't use them for page layout, but tables excel at presenting tabular data.
Your knowledge of HTML tables will improve your web development skills. It prepares you for interviews about this vital HTML element. Note that balancing functionality with accessibility and responsiveness matters when building tables. Tables might look straightforward, but good implementation needs attention to detail and focus on user experience across devices.
Key Takeaways
Master HTML tables to create structured, accessible data presentations that enhance user experience and organize information effectively.
• Master the four core elements: Use <table> as container, <tr> for rows, <td> for data cells, and <th> for headers to build proper table structure.
• Implement semantic sections: Organize complex tables with <thead>, <tbody>, and <tfoot> elements for better accessibility and browser rendering.
• Control cell spanning strategically: Use colspan to merge cells horizontally and rowspan to merge vertically for sophisticated data layouts.
• Style with CSS over HTML attributes: Replace deprecated attributes like border and cellpadding with CSS properties for modern, responsive table designs.
• Create responsive tables: Wrap tables in containers with overflow-x: auto and use zebra striping with :nth-child() for mobile-friendly, readable data presentation.
Tables excel at presenting tabular data but should never be used for general page layout in modern web development. When implemented correctly with proper semantic structure and CSS styling, HTML tables provide an accessible, organized way to display complex information that users can easily scan and understand.
Gain Industry-Relevant Skills and Secure a Tech Job Before College Ends!
Explore Program FAQs
Q1. How do I create a basic HTML table structure?
To create a basic HTML table, use the <table> tag as a container, <tr> for rows, <th> for header cells, and <td> for data cells. Start with a <table> element, then add <tr> elements for each row. Within rows, use <th> for column headers and <td> for regular data cells.
Q2. What are the benefits of using tables in HTML?
HTML tables are ideal for presenting structured data in a grid format. They organize information into rows and columns, making it easy to display and compare data sets like financial reports, product listings, or schedules. Tables improve readability and help users quickly scan and understand complex information.
Q3. How can I make my HTML tables more accessible?
To improve table accessibility, use semantic elements like <thead>, <tbody>, and <tfoot> to structure your table. Add a <caption> to provide a title or summary. Use <th> elements for column and row headers, and ensure they have appropriate scope attributes. Additionally, keep tables simple and avoid using them for layout purposes.
Q4. What's the best way to style HTML tables?
The best approach to styling HTML tables is using CSS. Instead of deprecated HTML attributes, use CSS properties like border, padding, and text-align to control appearance. For responsive design, consider wrapping tables in a container with overflow-x: auto. You can also use CSS to create zebra-striped rows or add hover effects for better user interaction.
Q5. How do I merge cells in an HTML table?
To merge cells in an HTML table, use the colspan attribute to span columns horizontally and the rowspan attribute to span rows vertically. Apply these attributes to <td> or <th> elements. For example, <td colspan="2"> will make a cell span two columns, while <td rowspan="3"> will make a cell span three rows. Adjust your table structure accordingly when using these attributes.


.avif)